Stable Overhead Framing, Supporting the Entire Venue: Core Value of the Overhead Rigging Truss System
Whether for hanging lighting and audio equipment in large venues, hoisting stage backdrops in theaters, or installing overhead devices in exhibition centers, the Overhead Rigging Truss System stands out as the core solution for overhead construction. It features super strong overhead load-bearing capacity and precise suspension control, and can also collaborate with diverse stage components to build a full-scenario overhead support system.
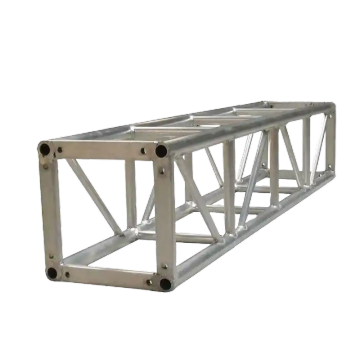
1. Overhead Load-Bearing Advantages: Dual Guarantee of Material and Structure
The Overhead Rigging Truss System can flexibly use aluminum truss or Aluminum Stage Truss as basic components. The lightweight nature of aluminum reduces the difficulty of overhead hoisting, while the high-strength alloy material can stably support small and medium-sized lighting and audio equipment, making it suitable for regular overhead scenarios such as theaters and small venues.
To handle heavy overhead loads (such as large LED screens and complex backdrops), the system can be combined with the Steel Truss System. The high load-bearing performance of steel, combined with the suspension structure of the truss, can resist overhead shaking and external impact, meeting the high-intensity overhead construction needs of gymnasiums and large concerts.
2. Full-System Compatibility: Seamless Connection Between Ground and Overhead Stages
It forms vertical support linkage with the Aluminum Alloy Plug-in Stage. The Overhead Rigging Truss System can provide an overhead suspension frame of corresponding size above the plug-in stage through precise measurement and positioning, ensuring the position matching between the ground stage and overhead equipment and avoiding construction deviations.
As an overhead extension component of the Raya Stage System, this suspension truss can cooperate with the modular structure of the Raya stage. It uses Raya Scaffolding to complete the preliminary construction of overhead installation points, forming a complete operation chain from ground support to overhead suspension. This makes it suitable for gala and celebration scenarios that require collaboration between ground and overhead operations.
3. Flexible Scenario Adaptation: From Fixed Venues to Temporary Construction
In fixed venues (such as theaters and multi-functional halls), the Overhead Rigging Truss System can be fixedly connected to the building structure. It can be paired with Aluminum stage truss to achieve a standardized overhead suspension layout, facilitating the quick mounting and dismounting of daily performance equipment.
For temporary events (such as outdoor music festivals and mobile exhibitions), the system can be combined with Aluminum Truss through mobile brackets. It does not rely on fixed building points and is also compatible with the temporary ground support of the Raya Stage System, enabling quick construction of a movable overhead suspension system to meet the overhead construction needs of temporary scenarios.


 Wuxi Zhongshengwei Metal Products Co., Ltd.


